
Often, the first sign of transom trouble is water migrating into the timber core. This creates hydraulic erosion that can shred the core or cause further areas of delamination.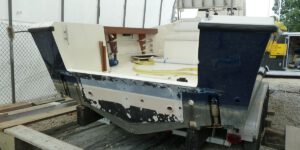
To repair this damage, you need to gain access to the interior of the transom. Tape up old bolt holes, etc., and allow the interior to air dry.
1. Dig out the rot.
Many times a transom will get wet, and it is not immediately obvious. The wood will still feel and sound good to the touch and to the ear (when tapping on the structure). The problem is that even slight rot in a transom has an impact on the structural integrity of that part of the boat.
The rot is caused by water entering the wood and, over time, reducing its resistance and strength. This effect is accelerated by the constant stress of a motor thrusting and pulling on the structure. This type of rot is very difficult to correct once it has progressed far enough that the transom will flex and sag.
As the rot grows, the weakened structure is susceptible to a great deal of stress that can cause it to break free or shatter. This is why it is important to check a transom regularly for signs of rot and to replace the rotten part before damage occurs.
Often, customers will try to repair an old transom without taking it apart by accessing the rotten core from inside the boat. This requires a lot of skill and tools. A reciprocating demo saw, grinder, hammer, and chisel will be needed to cut the exterior fiberglass of the transom to gain access to the inside.
It is also very helpful to take measurements before starting to remove the fiberglass: the fiberglass thickness of the outside skin, the plywood thickness of the inside transom skin, the stringer location and stringer thickness, etc. It would be wise to have a piece of the original transom saved in case there are any gaps that need to be filled in later with layup and laminating epoxy resin ™.
2. Remove the liner or sole.
As with any boat, it is important to support the hull prior to removing anything structural. Removing a stringer or transom without adequate hull support will result in an oily hull, so do your best to keep it supported and flat as you remove parts.
If your hull is supported, you can often remove the deck cap and liner of the transom and still be able to reach the core for repair and installation. I have seen this done several times on older boats with good results.
This may not be an option for you, however. Depending on your model, it may be very difficult to cut through the splash well bulkhead and deck cap of the transom to gain access to the core. Also, depending on the design of your motor well and the deck cap, it might be necessary to cut through the entire deck cap in order to get to the motor well.
Once water gets into a timber-cored transom, it travels between the plywood layers, creating hydraulic erosion (water migration). With each gear change and thrusting forward and aft, this creates extreme pressure, which can shred the wood and eventually delaminate the whole transom. If you can avoid knocking off the deck cap and liner of the transom and do it all from the inside, this will save a lot of time and money for both yourself and a shop doing it for you. You can always use the form piece you knocked off as a work bench. You can even add a bit of silica to it and make epoxy putty that you can use as the transition between your new transom and the hull sides and bottom.
3. Remove the old plywood.
The first step in the repair process is to remove the old plywood. This is a messy, sticky, and time-consuming job. But it’s necessary to ensure that you’re working with a solid, sound foundation. If you don’t, there is a chance that the transom will just rot right back out again.
A common technique used to replace a rotted transom core is to simply cut out the bad section and epoxy in a new one. This works well when the damaged core is relatively small and you have plenty of time to allow the interior of the transom to dry out.
But even when the damage is limited to a few inches, this method has serious limitations. Water migrates between the layers that create the integrity of a timber-cored transom, pushing it with extreme pressure with every gear change and when the boat is accelerating and braking on its trailer. This water penetration causes timber core shredding and delamination. and it eventually destroys the integrity of the entire transom.
To avoid this, you need to be able to access the interior of the transom from the outside of the boat, not simply through drilled holes. To do this, cut a hole in the top of each stringer 5 to 7 inches apart, let the insides dry (or blow dry them), and treat with CPES (TM) injections. Then drill a bottom drain hole and fill it with Fill-ItTM epoxy filler. Use a turkey baster to flow pure, mixed Layup and Laminating ResinTM into the holes. Let it cure and sand. Repeat as needed. This is not a foolproof repair, but it works very well in most cases. It’s also a lot less invasive than removing the entire I/O transom.
4. Remove the liner or sole.
The transom is a high-stress point on any boat that shouldn’t be ignored. When a wet transom core gets soft, it not only allows water to flow in and around the engine and other fittings, but it can also compromise the structural integrity of the entire hull. Many professional boat workers use the handle of a hammer to tap on the transom to check for softness. A crisp ring means a solid core, and a dull thud indicates a soft spot. Stains around poorly bedded fittings are another indication that the transom is taking on water and deteriorating rapidly.
Once a transom becomes wet, it is very slow to recover, and if the rot is extensive, a replacement may be needed. Many experts agree that drying a wet transom does not fix the problem and can actually make the rot worse because wood absorbs water and salt over time, which decreases the resistance and strength of the material. This doesn’t happen immediately and can take years to weaken the wood enough to need replacement. A common warning sign is a wet, spongy feeling when pressure is applied to the sterndrive leg and/or flexing of the transom when power is applied to the boat.
It is possible to “try” glycol injecting wet, but not yet rotten, transom and stringer wood encased in fiberglass, but it is a very long process that might buy you some time if the underlying transom isn’t completely destroyed (pix might help). It would still be a good idea to re-gelcoat the area afterward and to replace all of the plywood and stringer material. There is no short cut to this task!
5. Make a template.
Whether you own a fishing boat, sailboat, or powerboat, a well-functioning transom is essential to your water experience. Located at the stern of the vessel, the transom provides form and structure to the hull while distributing engine force. It also absorbs shock and vibration from the stern-mounted motor and other equipment.
A boat transom is made of a material like fiberglass, aluminum, or special wood. They can be rounded, square, or flat and vary in height depending on the boat’s size and measurement. It’s important to understand the basics of your transom so you can properly service it.
The first step in a boat transom repair is to clean up the area and make sure it’s dry. You can use acetone or a chemical degreaser for this. Once the area is cleaned, you’ll need to make a template of the inside of the old transom skin (or whatever you are replacing it with). This will help ensure that your new fiberglass is the same thickness and shape as the old one.
The next step is to remove the plywood and bonding putty from the old outside transom skin. Then you’ll need to sand the plywood to make it smooth and prepare it for your new fiberglass skin. It’s a good idea to have this done before you begin demolition, as it will save time and give you a nice, smooth surface to work with. Once you have a good template of the inside of your transom skin, you can cut out the wide pieces that will be used for your new inside transom skin. This will require some patience and attention to detail, but it’s an essential part of ensuring your boat’s transom is structurally sound for years to come.